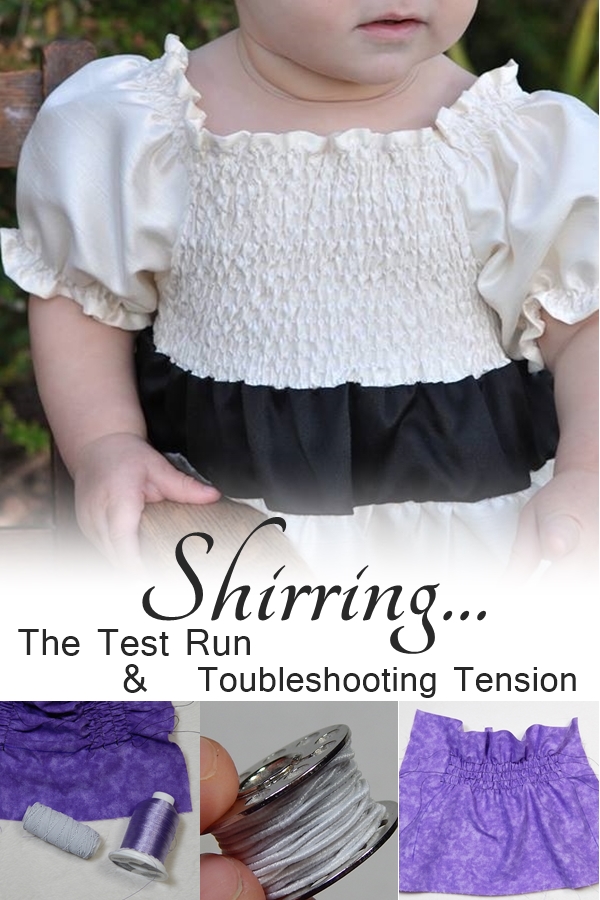
Shirring: Testing & Tension
2016 Apr 26th
Shirring is one of the most enjoyable sewing techniques I've learned over the years. There is something incredibly satisfying about looking at those rows cinching up behind the presser foot and knowing it's going to look awesome when it's finished!
If you are one of the lucky few, your sewing machine will have a magical ability to look at that elastic thread and say "no problem, I've got this" and you are away and shirring without any trouble... but most of us are not so lucky and there is a bit of tweaking needed in order to get that elastic thread to behave itself.
What is Shirring?
Shirring is the use of thin elastic thread in your lower bobbin, and you use it to create narrow rows of stitching across the width of a section of fabric. It's most commonly used on bodices to give the fabric plenty of stretch for getting on and off, and to be comfortably fitted through the torso when being worn. It can also be used at hems to create a "bubble" effect on sleeves or pants/shorts, and can even be used to create an elasticized waistband on skirts or loose fitting pants.
I'm new to all of this; how do I start?
Shirring is something you definitely need to practice on some scrap fabric before attempting it on a garment. You'll need to figure out what is going to work for your particular machine... but don't worry, once you've worked out the details, you'll be all set for future shirring endeavors!
First, you'll need your supplies:
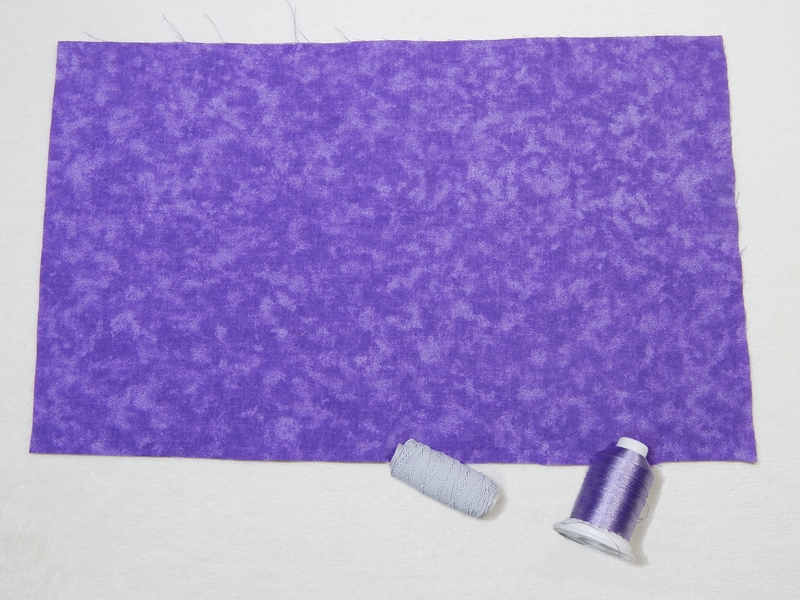
- Elastic shirring thread. Get the best brand you are able, because the better the elastic thread, the better (and more durable) the result. Some brands you may be able to find are are Unique, Dritz, Stretch-Rite, and Gutterman. If you don't have much in the way of options where you shop, that's okay... get what you can and just remember that if you do switch brands later, you might need to another test run in case the new brand behaves differently. If you have more than one brand available, it might be a good idea to pick up a couple different ones, as your machine might be picky about which one it likes (I'll talk more about that later, and show you some examples).
- Scrap fabric. Use the same type of material as you intend to use in the finished garment. The shirring will turn out differently depending on the weight of fabric you use (ie. thin fabric such as seersucker or cotton gauze will shirr tighter than quilting/fashion cotton). The heavier/thicker the fabric, the less power your shirring will have. It's best to stick to lighter weight fabrics.
- Thread to match the fabric you've chosen.
Getting Started
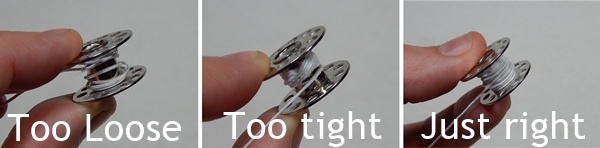
The first thing you need to do is get your bobbin loaded up with the elastic thread. You need to do this by hand. It goes really quickly because elastic thread is much thicker than regular thread. Wind the elastic thread on the bottom with just a teensy bit of tension. You don't want it floating loose, and you don't want to pull it snug either (at least, not until we know how your machine likes it!). Just wind it on there comfortably until the bobbin is full.
Now have a look at your upper tension and stitch length. If you've never shirred before, feel free to just leave your settings at what they usually are. That will give you a baseline for whether or not your machine prefers to be set higher or lower. Personally, I've found my shirring works best when I set the stitch length to about "5", which is slightly above the mid-length, and increase my top tension a little bit, to about "7". (My normal settings are "4" and "5".) You may find after testing that you will need to lower your upper tension instead; it just depends on the machine.
The Test Run
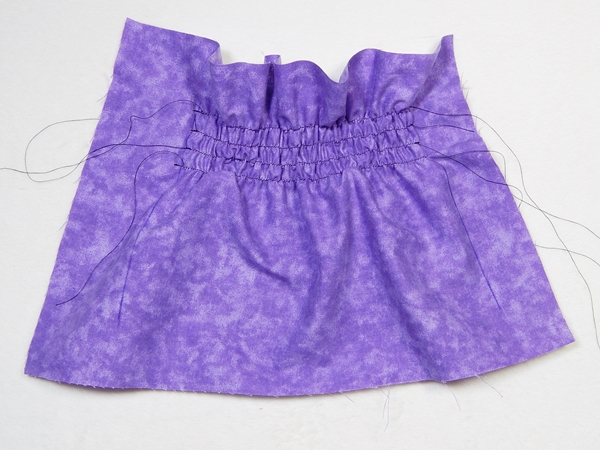
If you really want shirring to work for you, you need to do a test run to see how your machine handles the elastic thread. Proper shirring results in shrinking an area of fabric 45%-50%. (You want to aim for the 45% because of a little trick with steam that I'll tell you about later on). With that goal in mind, I'm going to show you how to test your shirring to see what adjustments you might need to make.
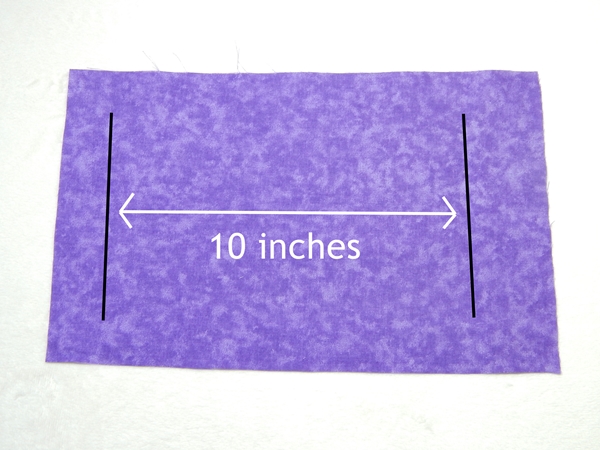
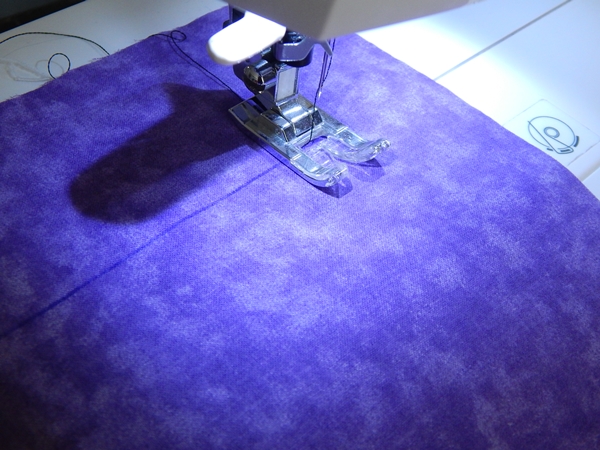
Step 1 - On your scrap fabric, mark two lines 10 inches apart. Your fabric should be right side up, because that is always how your shirr; the fabric needs to be fashion-side up and the elastic thread (which is in the bobbin) is sewn onto the underside of the fabric.
(If you are working in metric, that's about 25.5cm)
Step 2 - With the shirring thread loaded in the bobbin, and regular thread in the top, start your first row of shirring by anchor stitching ON one of the lines you've drawn on your scrap fabric (an 'anchor stitch' means putting your stitch length to ZERO and stitching 3-4 stitches in place; it is a better option than backstitching, which can be problematic for some machines when using elastic thread in the bobbin).
You are going to stitch from one line to the other, NOT down the line itself, so make sure yours is positioned the same way I show here.
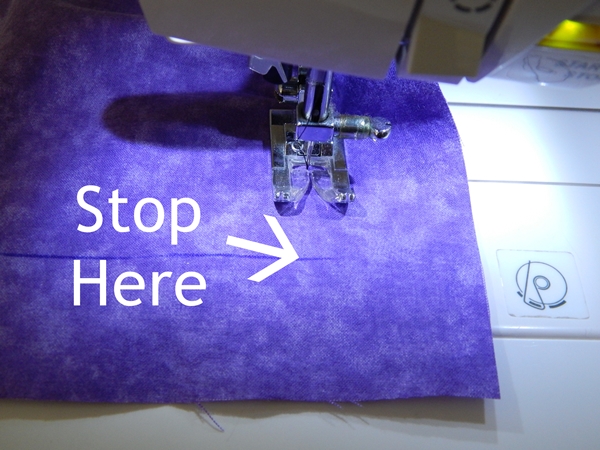
Step 3 - Stitch a straight line from the first line, to the second line. Do an anchor stitch to secure your threads
This will make your first row of shirring! Now, you may already notice problems (really obviously not tightening, or it's already way too tight)... so if that's the case you can skip ahead to the troubleshooting section below. If it looks pretty good (and remember, it will get tighter as you add more rows)... keep going through the test run!
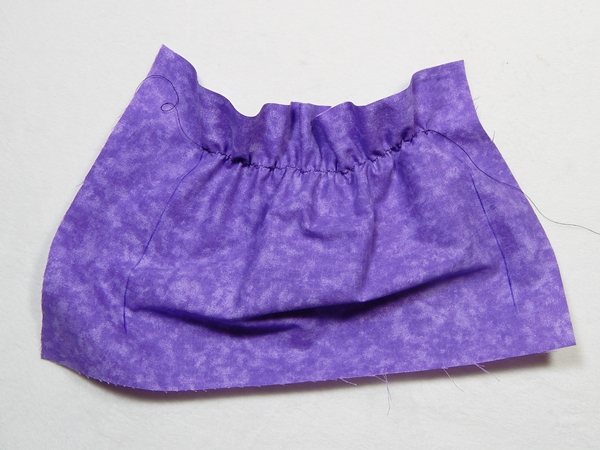
Step 4 - Cut your threads (top and bottom) and then go back to the line you started at again. Make another row of stitching parallel to the first, keeping the rows about 3/8"-1/2"(1-1.25cm) apart. Use the edge of your pressure foot as a guide... this is just a test so it doesn't have to be perfect.
Repeat until you have 4-5 rows of shirring complete
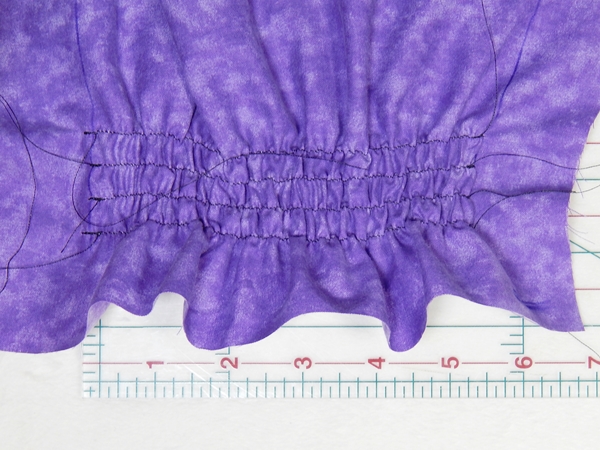
Step 5 - Now, using a ruler or tape measure, check the distance between the original lines that you drew on the fabric, making sure that the elastic is completely relaxed. This will tell you how much your shirring is pulling the fabric in! You want to see it at about 5.5" (or 14cm)... that would mean your shirring is shrinking the fabric exactly 45%!
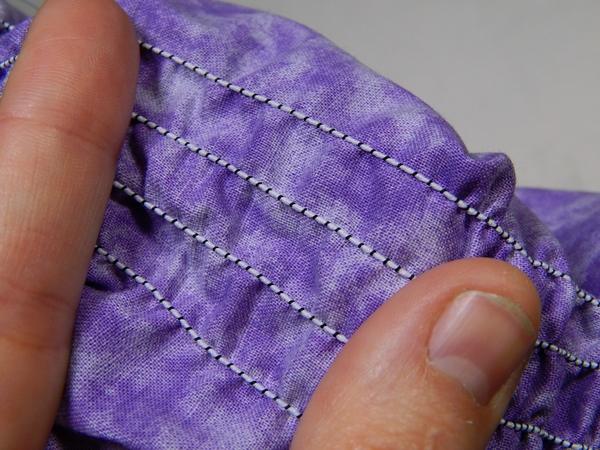
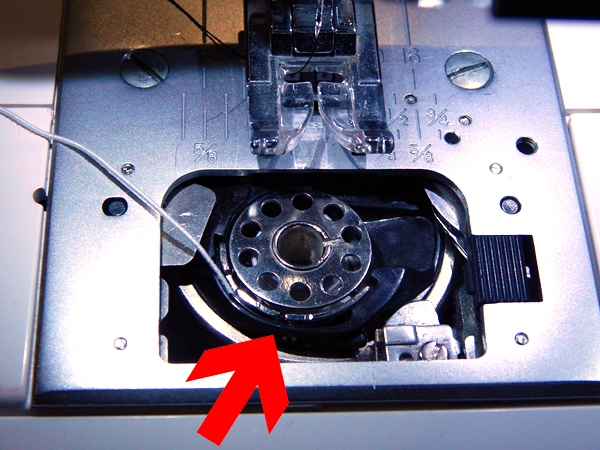
Turn your shirring test run over to have a look at the back. You want to see the elastic thread straight and neat against the fabric (no areas where bits of elastic look like they "missed" or twist out of place), and the thread from the top should snugly hold the elastic in place. There shouldn't be any parts of the top thread that is loose either, the elastic shouldn't be able to slide around inside the loops from the top thread when you stretch it, and neither should the top thread break.
What if it didn't work or something doesn't look right?
Don't worry! If something seems off or if you didn't get close to that 45%, it probably just means you need to play around with your tensions a bit. If you still have more fabric left from the piece you did your trial run on, trim off the section that you have shirred so far so you can use the remainder of the piece without that shirring affecting your new results. If you used it all, find another piece of scrap for a new trial run.
- If the shirring was just a little bit too loose (let's say the finished measurement was 6-6.5"), then you might be able to just hand wind the elastic thread tighter to add enough tension to bring it in the rest of the way. Try that first and see if it makes up the difference. Some machines work better with the elastic wound tightly, and some don't.
- If the problem is on the back of your shirring and seems to be just with the top thread (areas where the thread is too loose with loops of thread allowing the elastic to shift around OR if the top thread breaks when you stretch the fabric), you need to adjust your top tension. Tighten the top tension if there are areas where it is too loose, or loosen it if the top thread is breaking. Then try again to see if that solves the problem. If you've tightened the top tension and it's still not grabbing hold of the elastic, try a shorter stitch length.
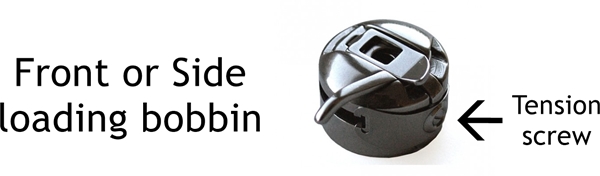
- If your shirring is not pulling in nearly tight enough (or even seems to hardly be pulling it in at all!) or the elastic thread looks like it's squiggling all over the place, you've got what is probably the most common problem when first learning to shirr. Your lower tension is too loose. This means you'll need to tighten the tension on the bobbin case itself. If your machine has a bobbin case that comes out for regular loading, that's easy... your manual should have instructions, but likely you already know that there is a small screw on the side that allows you to change the tension. For those that have a drop-in bobbin... it's a little more complicated. I've got a drop-in myself, so I'll show you how to do that with my machine.
The Drop-In Bobbin
My machine is a Singer with a top-loading drop in bobbin. I need tighter tension on my bobbin case when I'm shirring, so I actually have a separate bobbin case for shirring elastic than for regular elastic, because that way I can keep the shirring one at the tension I find works best and my regular thread bobbin case at the normal factory-set tension I use for all other sewing. Drop-in bobbin cases are not expensive, so if you think you'll be doing a lot of shirring, definitely consider getting a second one to dedicate to shirring!
If you don't have or want a second case though, don't worry... just make sure you write down exactly how many turns to make on the tension screw to adjust the tension back and forth between shirring and regular stitching.
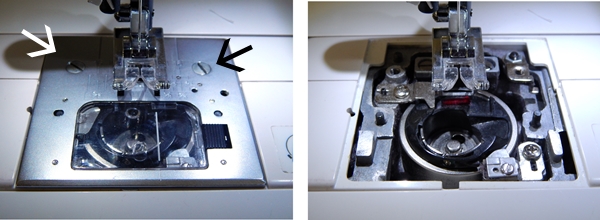
The first thing you need to do, is remove the plate that covers your bobbin casing.
This is what mine looks like (Photo 1: plate on with arrows marking the screws that remove it; Photo 2: plate off):The bobbin case is the black thing that you place the bobbin into when you change it. That whole piece lifts out. (I have to give mine a bit of a wiggle to get it to come out, but all of a sudden it pops right loose). Practice a couple times putting it in and out just to get the hang of it.
On the side of the bobbin case, you'll see a small screw that looks like this. That is your tension screw. Right now, it is perfect for sewing with regular thread, but we need it tighter (unless of course your problem was the opposite and your shirring was way too tight... in that case you'll need it looser).
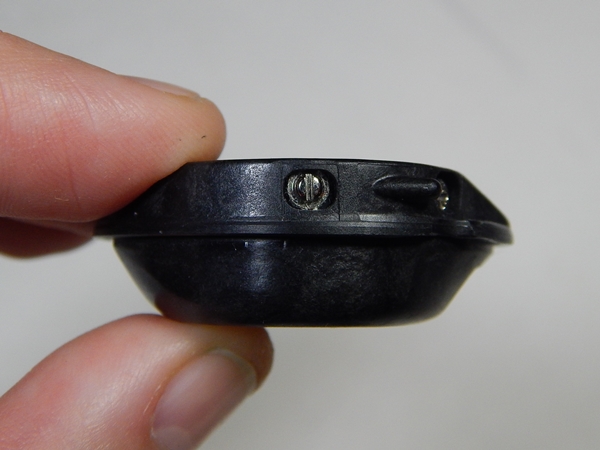
To tighten the tension, you're going to simply turn that screw clockwise. BEFORE YOU DO, you'll want to keep track of how much you are tightening it in case you need to set it back again for future sewing with regular thread, and also in case you need to do a couple more test runs before you have it exactly right. Write it down if you need to because you don't want to forget what you've done!
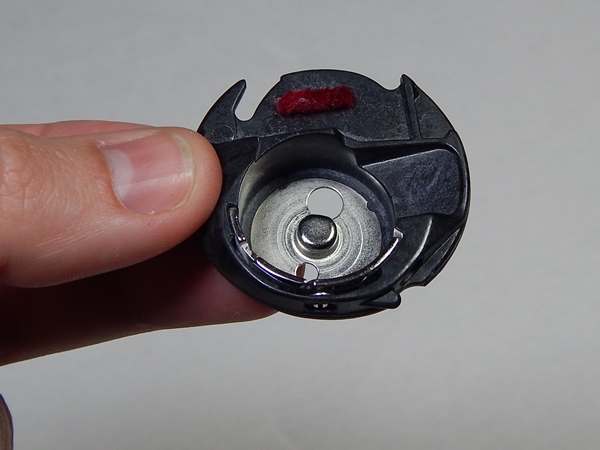
For my machine, I only need to make one full turn to have perfect tension for shirring. You can start with that as well as it will give you a good idea of whether or not you're on the right track. Turn the screw clockwise one FULL turn, then put the bobbin case back in your machine, and put the cover plate back on. Put your bobbin loaded with elastic thread into the bobbin case an normal. DON'T FORGET to put the elastic thread through the little notch in the case... this is what holds the tension!
Now, do another Test Run!
If you've managed to hit that 45% this time, you now know exactly what your lower tension needs to be for shirring compared to regular sewing! If it's too tight now, open it back up, loosen that screw a half-turn and test again. If it's still not tight enough, tighten it some more (keeping track of what you do). Eventually, you'll find the perfect mix of tension and you'll be all set to shirr to your hearts content (and you shouldn't have to do this testing again unless you change the weight of your fabric or the type of elastic thread you are using)!
What if it's STILL not working?!?!
First, don't give up yet! There is one thing that you have to try before you give in to the urge to throw your sewing machine out the window... try a different brand of elastic thread.
I'm going to use photos to soothe your doubts.
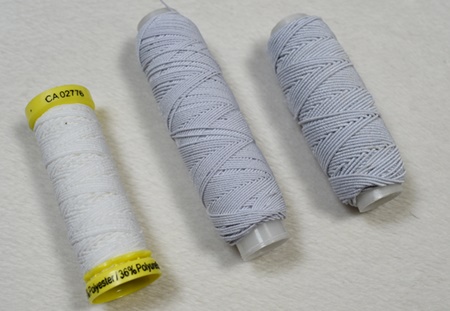
Shown here are three different brands of elastic thread. Gutterman, Dritz, and Unique. I've tried all three, and the Unique brand is the one my machine likes. In spite of all the tricks I know, I simply can't get the other two brands to work as well. Your machine may be similar to mine, or prefer another.
The Gutterman brand is the softest. The Dritz is the thinnest. The Unique is the thickest and stretchiest.

So, if after all the tension adjusting still isn't getting you down to 45%-50%, see if you can get another brand of elastic to try. If the one you have seems thin, try a thicker one. If your machine is struggling or if you problem is that it is actually too tight, try a thinner or softer brand.
A Few More Tips & Tricks...
- You may find it helps you keep your rows straight if you draw a few "guidance" lines across the width of the fabric you are going to be shirring with a fabric pen or chalk before you start to shirr.
- My machine tends to make a lot of noise when I shirr. It's a bit of a squeal-groan type noise (if your machine does it too, you'll know what I'm talking about). It freaked me out in the beginning, but I've since learned that it's quite common so don't let it worry you!
- Make sure that you finish any hems before shirring! It will be much more difficult, if not impossible, to finish them afterward. Your first row of shirring should be as close as possible to the hem without stitching into the hem itself. A narrow hem will give a nicer finish than a wider one.
- The closer together your rows of shirring are, the tighter it will look and stronger it will "pull". For a loose shirring, space the rows further apart. The ideal spacing for most shirring on bodices and waistbands is 3/8"(1cm) to 1/2"(1.25cm) apart. It can be as close as 1/4"(6mm) on sleeve or pant hems.
- ALWAYS lock your stitches at the beginning and at the end of every row. To do this, turn you stitch length down to zero ("0") and stitch forward about three times. This "locks" the elastic in place so if it breaks you won't loose elasticity in more than one row. Backstitching with elastic thread can cause problems for some machines, so doing this is a safer method of securing the thread ends.
- If you run out of bobbin thread before you are done (and you probably will, you go through it much faster than with regular thread!), don't panic. Simply take enough of the top thread so you can hand-stitch it through to the back. Then tie the thread tail and the loose elastic end in a knot. (Note: This is how you should finish ALL thread and elastic tails). Reload the bobbin, then go back a little ways along the last row you were working on and start stitching again. Once that row is finished, do the same thing with the thread and elastic tails from when you started.
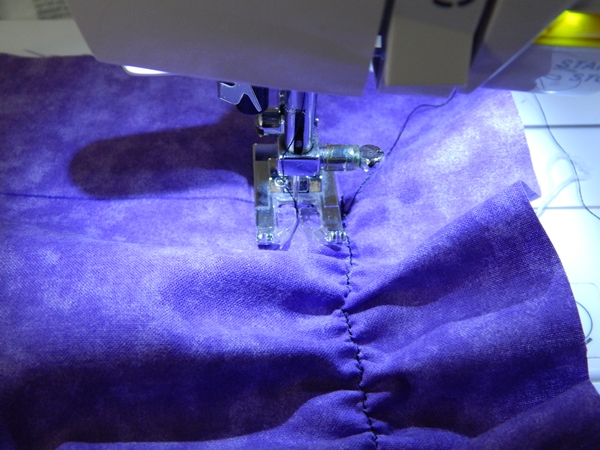
- The more rows you do, the trickier it will be to keep the fabric going straight under the pressure foot. Guide the fabric with both hands, and if you go a little off track just straighten out again and keep going. The final result is very forgiving of the occasional "wobbly line".
- When you are done stitching every row, a bit of magic that happens to elastic thread when it's hit with a bit of steam from an iron or in a dryer... the elastic cinches up even more! It will bring your shirring in up to another 5%... making perfect 50% shrinkage! Watching it happen is a pretty satisfying way to finish off your shirred project!

- And lastly, here is a short video demonstration from one of Pollywoggles' Testing Team members, showing both the "anchor stitch" that I mentioned earlier (locking the thread & elastic at the beginning and end of every row with a "0" stitch length), and also a handy way to cut down on the number of thread and elastic tails you'll end up having to tie off. This may not be a trick that will work on your machine, so be sure to test a few rows on scrap before attempting this trick with your main project.
I hope that this tutorial has been helpful! Shirring is worth figuring out, even if it seems a headache if you happen to have one of those difficult-to-please machines. I love the simple feminine look of shirring and how it's comfortable and easy to get on and off. Once you figure it out, it's definitely addictive!
Now that you've got the hang of it, give the shirring options a try on the Okanagan, Kluane, or Deerwood patterns!